
Assigning and Managing Accommodation
Accommodation
Please note, that to use Accommodation features in Hostology, you will first need to have set up your rooms and features at the Venue Management level. Having created your rooms, and added in details such as images, extras and "general pricing", you can assign them to events.
To see the accommodation section for an event, go to the event page and select 'Event Planning' then 'Accommodation' on the left hand side menu.
Assigning a room to an event
Go to the accommodation tab at the top of the accommodation page, to show you all the rooms your venue has created.
You can either assign rooms to your event individually or in bulk:
- To individually assign a room - Select the checkbox on the left hand side of one or more rooms and then select the "Assign Rooms" button.
- To assign all available rooms - Click the "Select all" button (you will notice all rooms appear to be ticked) and then select "Assign Rooms".
Once you select "assign rooms" a pop-up will show providing you options to add these rooms to the event.
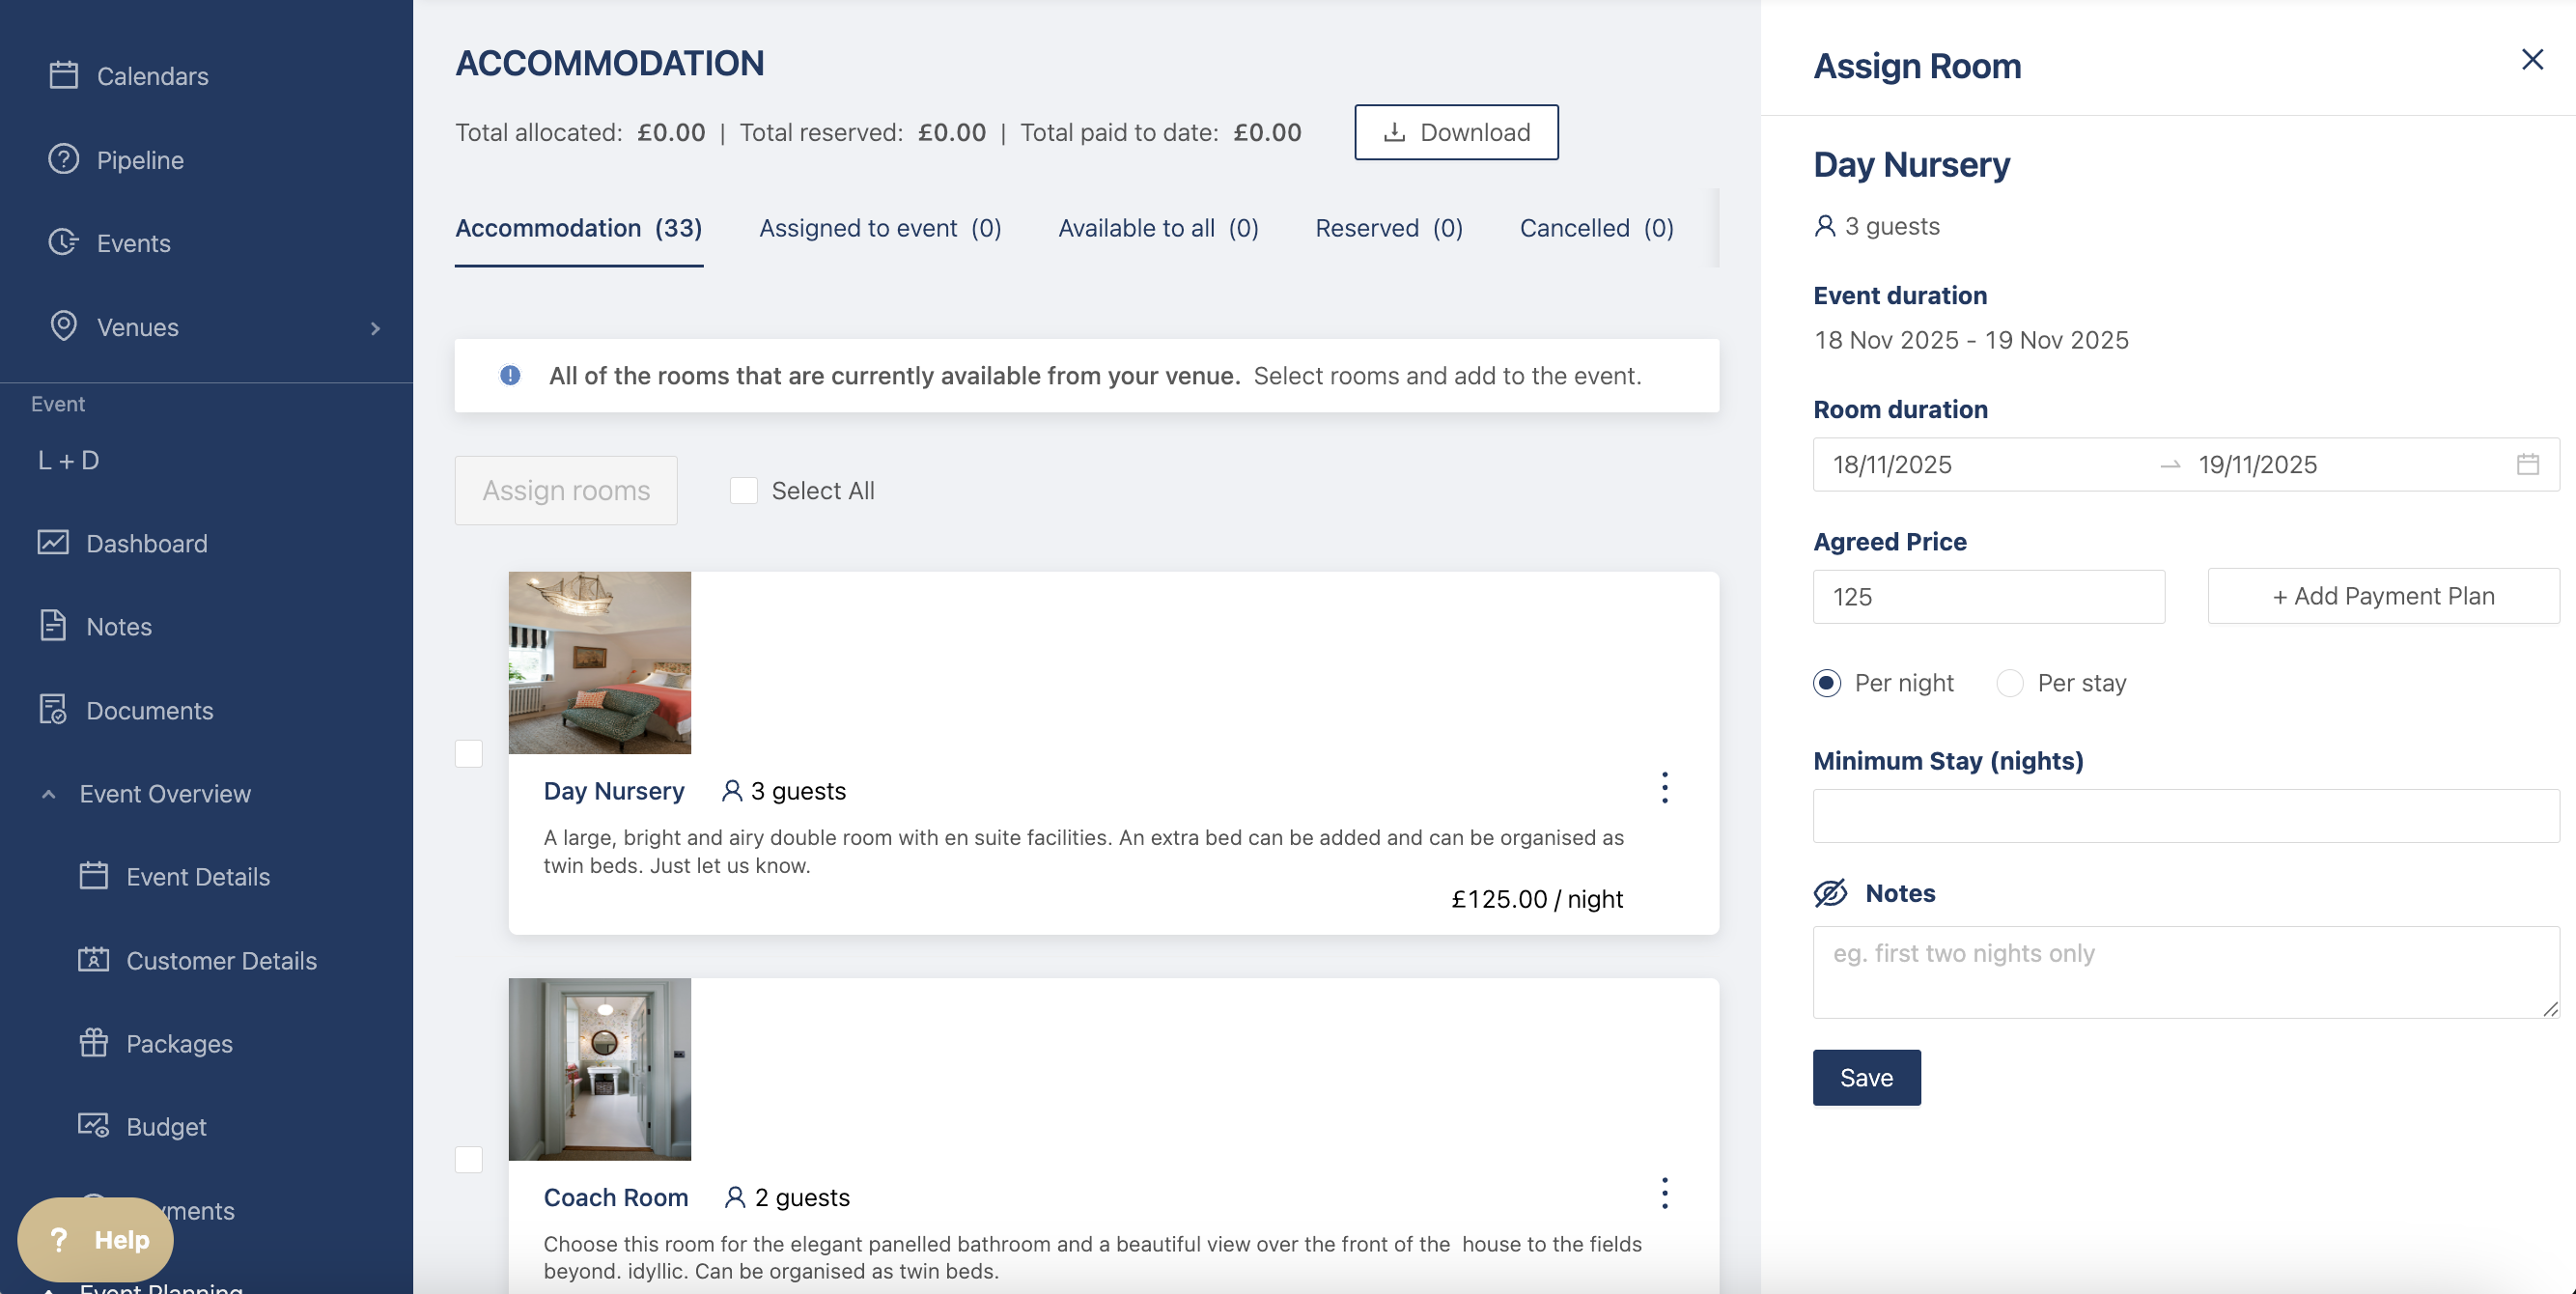
- Room Duration - Time period that a room is available for guests to book (the default being the event duration).
- Agreed Price - Specific price per night or stay can be applied for an event. Discounts or price increases can then be assigned to rooms(If you leave this blank, rooms will be added with their default price)
- Payment Plan - Add a payment plan if you want to split the room payment, read more here
- Minimum Stay - If there is one
- Notes - These are internal notes to be added to the rooms.
Press the "save" button and these rooms will now be assigned to the event.
To see the assigned rooms for an event, go to the "Assigned to event" tab at the top of the page:
Customers will now be able to see the rooms assigned to their and either book or make them abailable for guests. Once your customers book rooms, they will then move into the "Reserved" tab, where you will be able to see guest details and follow/track payments.
If you want to learn more about what your customers can see & do, check out their support article here
Editing an Assigned Room
You can make changes to an assigned room, including:
- Global Discount - To apply an overall discount to the event, select the "Global discount" button and add the % you would like to deduct from all assigned rooms.
- Edit Room - To change dates/prices of the rooms, click the 3 dots at the end of the room details box and select "edit room".
- Remove from the Event - Simply select the 3 dots and then click "Remove from the event". The room will now return to the original "accommodation" tab and no longer be available to your customers to book.
Please note, that if a customer has booked a room, you will not be able to edit the details anymore. You would instead need to cancel the room and then edit information.
Booking a room
As a Venue, you can book rooms on behalf of your customers. Please note, your customer will have needed to add their guest list and then made the rooms available to all for you to book their customers into rooms.
To do this, select the 3 dots on the top right corner of a room, then click 'Book room'
Once here, you can fill out details or the room including guest name booking duration or extras.
Once you book a room for a customer, they will only receive an update and be able to pay for a room if they have an email address associated with their account. If they do not, you/your host will need to contact them directly and make payments on their behalf.
Viewing Room Booking Information
To see information regarding a booked room, go to the "Reserved" rooms tab in the accommodation page:
This will provide a list of all the rooms that have been booked for this event, with information showing:
- The Room Name
- The Duration the room has been booked
- The Name of the lead guest staying in the room
- Two Icons indicating:
- If there are any additional extras with the booking
- If there are any notes on the booking (added by Guests/Customers)
- The Payment status of the room:
- Fully Paid
- Partially Paid (If split between Host/Guest)
- Unpaid
If you click the room, you will also be able to expand the view and see more information, including:
- The Payment details (who is responsible for paying and how much they owe)
- Guest Information (Who is staying in the room, including contact info and dietary requirements).
From here, you can also manually change the payment status of a room booking. If you are not taking payments via Hostology, you can manually change room payment info to "Paid Offline" (e.g. for payment over the phone).
You can also edit Guest information, or add extra guests into the room that are staying - along with updating Guest dietaries. To do this select the 3 dots next to the Lead Guest and select either "Edit" or "Add Guest".
Cancelling a room
To cancel a room booking, go to the "Reserved" room tab. From here, select the 3 dots at the far right of the room booking you wish to cancel and then choose "Cancel booking" from the two options. It will then say "Are you sure". Select "OK" if you want to proceed.
A cancelled room will return to the "Assigned to event" tab for you to either edit or remove the booking from the event. It will also appear in the "Cancelled" tab if a payment or partial payment has been made. In this view, you will be able to mark the room as refunded or not, to be able to keep track of payments.
Please note, Hostology does not automatically administer refunds for any payments. If you are cancelling a booking and need to refund, you can do this via the connected stripe account. For more information on how to do this via stripe, you can see their support page here. You can then mark the cancelled room as "Refunded", by selecting the 3 dot menu and then choosing "Refunded".
Payments
To be able to take payments for rooms via Hostology, you will need to have a connected Stripe account (please see this article for more support on what this means). Your Customers can login to their account and make payments for rooms that will go directly to your account. However, refunds are your responsibility to process back to the customer and not automated by Hostology.
If you would like support in setting up your Stripe account and understanding the best way of using payments, contact us at Support@hostology.co.uk for a quick consultation.