
Itinerary templates
An "Itinerary" is the itemised plan for the day(s) of the event. An itinerary template is a saved version of an event itinerary, which you can import on to events the length of your event duration must match the number of days on the template
Only Super admins and Venue Admins can create and edit itinerary templates. Venue Users can see the templates and ALL users can add a template to an event (you can create as many templates as you like).
How to create a template:
1. First go to Venues and select your venue. Then click on 'Planning' and 'Itinerary Templates':
2. Click on 'Add new' then fill out the required information and click 'Save and add to template'
3. You can edit and delete your template by clicking the 3 dots next to the template you want to edit or delete.
Adding itinerary items
Once you have created the template, you will then land on a page with the amount of days. You will see the option in each day to "Add itinerary item".
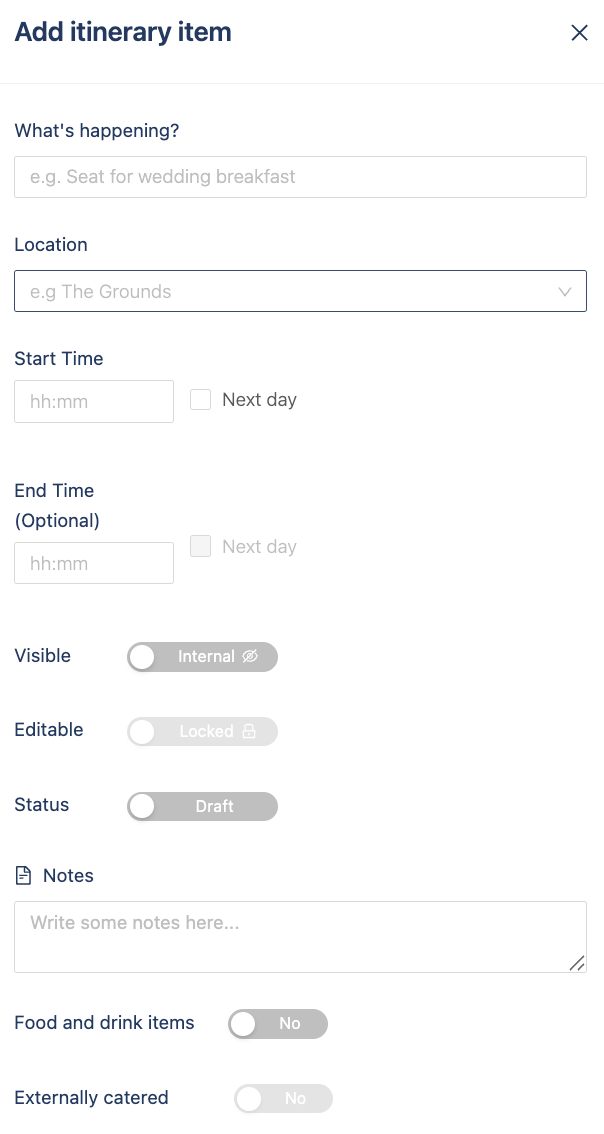
This will then open a pop-up box for you to add in the details of the itinerary item, including:
- Name - What is happening? e.g. "Speeches", "Prepare Rooms", "Guests arrival"
- Location - Which part of your venue is this happening? e.g. "Reception" or "Dance Floor" Change these in the Event Spaces
- Start/End time - When does it start/end(optional) and if you'd like it to be on the next day e.g the event is from 9am to 1am the following day
- Permission settings (Visible, editable, status) - See below for more details.
- Notes - These notes are for reference, customers can see if shared.
- Catering - See below for more details
Press save and see the itinerary appear in the view of the itinerary template.
You can add as many template items as you like to the day. You can also edit them once you have added, by clicking anywhere within the itinerary item box:
Permissions/Settings
When adding an itinerary item, there is a section of Permissions/Settings. These are:
- Visibility - Internal (only venue can see) or Visible to all (Your Customer/Host can also see)
- Edit-ability - Locked means only venue users can edit the itinerary event, Unlocked allows your host to edit too.
- Status - This allows you to set the itinerary event as a draft or confirmed
Top tip! - If you are letting your customers edit, set the status to "Confirmed". This means when they edit it, it will become a draft, and can make it easier for you to track and see changes.
Food and drink
Click the food and drink item to add food or drink to the itinerary. Once you press save, you will also see the Knife and fork icon appear to show there is catering for this part of the day. You can mark the item as "Externally catered" if a supplier or customer is bringing the food, separate to your business.
Top Tip! - Only add food and drink into the itinerary template if you have these at the specific times for "Most events". Otherwise, it can be simpler to add in food and drink in the event